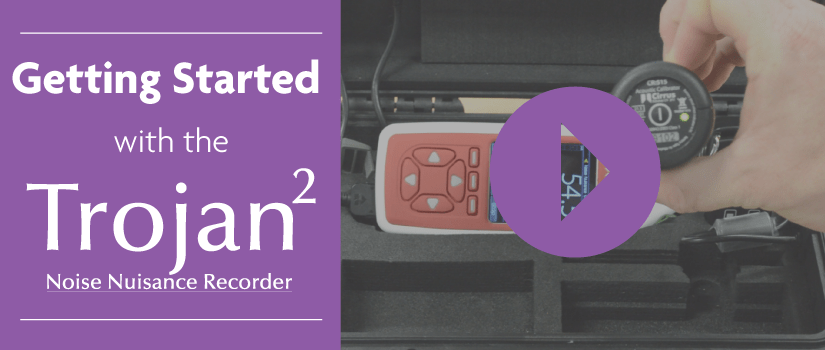
Getting Started with the Trojan2 Noise Nuisance Recorder [Video]
Introducing new nuisance noise monitoring equipment can be challenging for Local Councils, Housing Associations and Environmental Health Officers. You can have large teams working over multiple locations and at different times. That’s why we’ve come up with a simple training solution for your team and the Trojan2 Noise Nuisance Recorder.
We created this comprehensive video that covers the set-up and deployment of the Trojan2 Noise Nuisance Recorder. Now you can easily train whole teams at once and provider refresher training at the click of a button.
Covered in this Video:
- What’s included with the Trojan2 Noise Nuisance Recorder
- How to connect all the cables and set-up the equipment
- Setting the time and date correctly
- How to calibrate the Trojan2 Noise Nuisance Recorder
- What you need to do before starting a measurement
- Why you should make a test recording before leaving the equipment
- How to end the measurement and safely collect the Trojan2 Noise Nuisance Recorder
Watch on YouTube
Watch on Vimeo
If you’re unable to access video streaming websites within your business, please contact us to request a USB or DVD copy.
WATCH NEXT: NoiseTools for Noise Nuisance Recorder Users [How to Videos]
Now that you’ve watched the video, you should be able to assemble the equipment correctly and deploy it to record all forms of nuisance noise.
You can find out more about the Trojan2 Noise Nuisance Recorder by visiting: www.cirrusresearch.co.uk/trojan2.

Transcript
“Getting started with the Trojan2 Noise Nuisance Recorder
In this video, we’ll go over the set-up and deployment of the Trojan2 Noise Nuisance Recorder.
Unpacking the Equipment
When you deploy the Trojan, you’ll need to make sure that you’ve got all of the essential components to hand. You’ll have the need the following items.
- The main box
- The noise measurement instrument itself
- The acoustic calibrator
- The microphone and preamplifier with a tripod mount
- A remote control
- The mains power supply with UK plug
- The Microphone cable
- A small tripod which we’ll use to hold the microphone and preamplifier
- The foam windshield
- A padlock to secure the case
Connecting up the Cables
If the microphone and preamplifier are not already connected to the microphone cable, take them out of the box and get the microphone cable ready.
This is the microphone capsule, which is the most delicate part of the system, and the long silver tube is the preamplifier.
The black part is the adaptor that allows the microphone to be connected to a tripod.
To connect the preamplifier to the microphone cable, we need to connect the plug and socket together.
The best way to do this is to hold the preamplifier in your left hand and the connector in your right.
Very gently put the two parts together. If they don’t click together straight away, gently turn the preamplifier until the plug drops into the socket.
Now gently turn the locking ring to pull the two parts together until the locking ring is finger tight.
Do not force the connectors together and don’t over tighten the locking ring. You need to be able to take these apart when the measurement is finished.
Put the windshield onto the microphone to protect it whilst we’re setting up the rest of the equipment.
Take the mains power supply and plug it into a socket and switch it on.
On the lid of the main box there are two lights.
The green light shows that the mains power is connected.
The other light will show when the instrument is making a recording or when a button on the remote control is being pressed.
The sound level meter in the box will start up when the power is switched on.
After a few seconds the display will show a number that will be moving up and down.
If you don’t see the numbers, check that the information at the top of the screen reads Noise Nuisance View.
If it doesn’t press either the right or left arrow keys to change the display.
Setting the Clock
The next thing that we need to do is check that the clock in the sound level meter is correct.
Everything that the instrument does is stamped with the time and date so it’s important that this is set correctly.
At the bottom of the screen you can see the time and date that the instrument is currently reading.
If this is correct we can move onto calibration.
If it’s not correct, press the menu button.
Use the arrow keys to move to the Set Clock option and press Select.
Setting the time and date is similar to your mobile phone. You can use the up and down keys to change the value and the left and right arrow keys to move between the numbers.
When you’ve got both the time and date set, press OK and then press Back to go to the main screen.
Calibrating the Equipment
Calibration of any noise measurement instrument is very important and even more so with equipment like the Trojan.
You need to be certain that the equipment is working correctly and that any information recorded is accurate.
To calibrate the instrument, take the acoustic calibrator from the main box.
This unit has a button on the end that lets you switch it on and off.
On the other end is a small hole that we will put the microphone into before we calibrate the equipment.
Press the button and the green light will show.
If the green light does not show, you will need to change the battery in the acoustic calibrator.
Take the microphone and preamplifier that we connected earlier and remove the windshield.
Gently push the microphone into the hole on the end of the acoustic calibrator.
There are two rubber seals in the hole to make an airtight connection so it may be a little stiff.
When you’ve got the microphone into the hole, press the power button on the end of the calibrator.
The green light will light up and the sound level meter will show around 94 dB.
Don’t worry if it’s not exactly 94dB as the calibration process will adjust the level.
Press the calibrate button on the sound level meter. The screen will go blue.
When the calibration is complete the display will show “calibrated to 93.7dB”
Press OK on the sound level meter.
Press the button on the acoustic calibrator to switch it off.
Very carefully pull the microphone from the calibrator and put the calibrator back into the case.
Put the windshield back onto the microphone to protect it from damage.
We can put the microphone and preamplifier onto the tripod now.
The Trojan is supplied with a small tripod but you can use any standard camera tripod.
The microphone should now be positioned where it will be left for the duration of the measurement.
It is a good idea to take a photo of where the microphone has been placed so that you can be sure it has not been moved during the measurement.
It’s also a good idea to reinforce to the user that the equipment should not be moved at all and that if they do accidentally move it or something happens to the power, they should record this on their log sheet.
Getting Ready to Make a Measurement
Take one of the remote control units from the main box. We will use this to start and stop audio recordings and this will be left with the person who will be using the equipment. Press the Start button on the sound level meter to begin a measurement.
In the top left corner you will see a red spinning indicator that shows that the instrument is measuring and storing data.
At this point the sound level meter is measuring the noise levels but it is not recording audio files.
Close the case of the main box and lock it using a padlock.
Making a Test Recording
It’s always a good idea to check that the user is happy with what they need to do to start and stop a recording, so we can use the remote control to make a short sample recording.
Press the start button and the red light on the remote control will flash.
The red Record light on top of the main box will flash and then stay on. The sound level meter is now recording an audio file.
It’s useful to say something like “Recording started at 9.30am on the 22nd September 2015. We’re at 127 St Johns Road and the user is Mrs Smith. Mrs Smith, can you confirm your name and the date please and that you understand how to start and stop the recordings using the remote control. Each time you press the button please record it onto the log sheet.”
Press the square button on the remote control to stop the recording. The sound level meter is still measuring and storing the noise level information.
What you say at this point is up to you but this information can be very useful when playing back the recordings as it can allow you to check that the user understood what was required of them before you leave the equipment.
The Trojan also has pre and post trigger functions that allow it to capture information from a period before and after the user presses the Start and Stop buttons.
How these function works can configured in the NoiseTools software and they can be very helpful in providing effective recordings and identifying the source of the noise.
The remote control can be left with the user to start and stop recordings as needed.
Ending the Measurement and Collecting the Equipment
When you come back to collect the equipment the green power light should be on.
It can be a good idea to make another recording to state the time and date that the measurement was ended.
Press the triangle key on the remote control to start a recording.
When the red Record light shows you can say the time and date and any other information that may be useful later.
Press the square button to stop the recording.
Unlock and open the case.
The sound level meter has a sensor to measure the ambient light which helps it to save power.
As the case has been closed for some time, the display may be off.
Behind the keys are lights and these will be flashing once a second to show that the screen is in power saving mode.
You can press any button to turn the display back on.
Press the Stop button to end the measurement. Press the Exit key to go back to the main screen.
It’s a good idea to calibrate the equipment again so this is the same process that we did when we setup the equipment.
Take the calibrator out of the box.
Remove the windshield from the microphone and carefully push it into the hole on the calibrator.
Switch on the calibrator and press the calibrate button.
Wait for the calibration to complete and press the OK button.
Carefully remove the microphone from the calibrator.
Switch off the calibrator and put it back in the case.
Press and hold the power button on the side of the sound level meter to switch it off.
When the unit has shut down, switch off the mains power and remove the power supply from the socket.
We need to put the microphone and preamplifier back into the box and this needs to be done carefully.
Hold the preamplifier in your left hand and slowly loosen the locking ring.
When the locking ring has been loosened, the connector will come away from the preamplifier.
Put the microphone and preamplifier back into the box.
Close the box and put the accessories away in the carrying case or rucksack as needed.”

Jaymee-lee Tolliday
Latest posts by Jaymee-lee Tolliday (see all)
- Turning Down the Volume: How the Trojan Noise Nuisance Recorder can help create a quieter world - 13th February 2024
- Festive Opening Hours 2023 - 6th December 2023
- Award of Excellence for Cloud-Based Monitoring Solutions 2023! - 20th November 2023